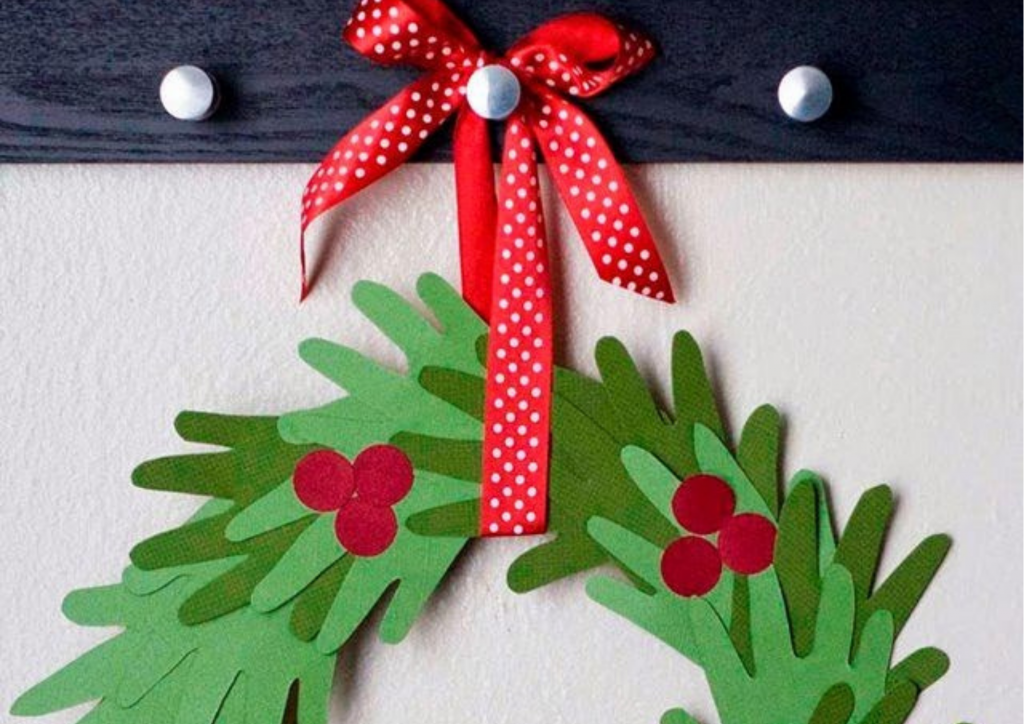
Kids DIY: Handprint Christmas Wreath
Christmas is just around the corner and with the kids home, you may need some ideas to keep them busy. We adore this lovely, kids’ handprint Christmas wreath. It makes for a great decoration over the holidays and is easy enough for even your toddler to give it a go. This little wreath can also be a great gift for grandparents and teachers. Gift it to someone special before the Christmas break – allowing them to put it up in their house before Christmas Eve.
Parental guidance is always advised when sharp objects like scissors are being used.
Supplies
A black sharpie
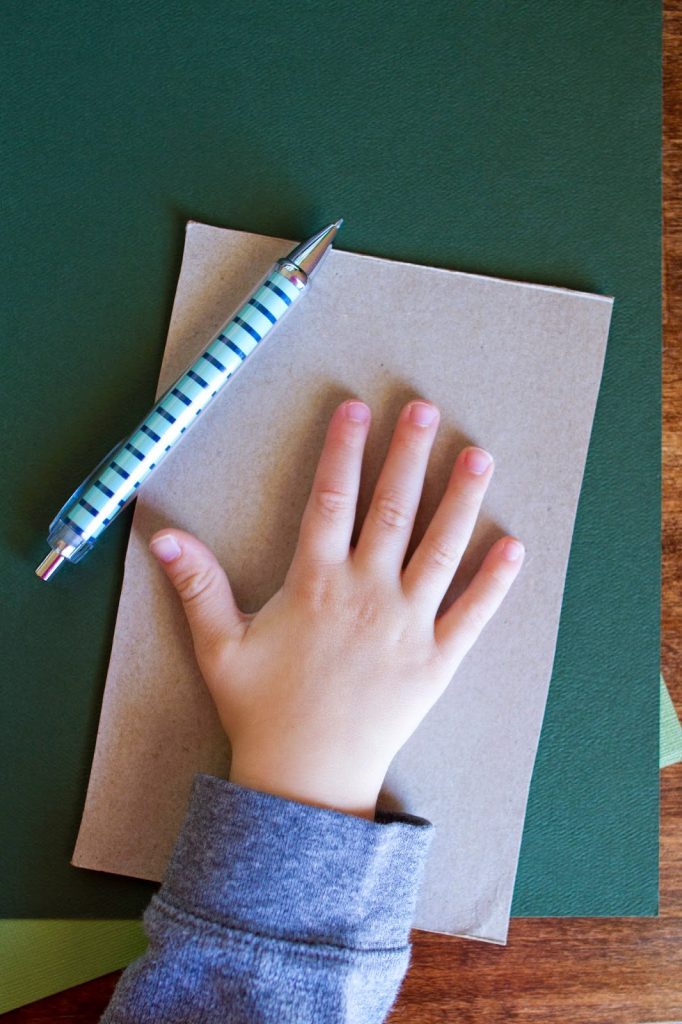
Thick cardboard (200gsm) or the back of a cereal box can also do.
6-8 A4 green varieties of cardboard (160gsm). Use different shades of green for depth and variation. The amount of hand designs will depend on how big your child’s hand is.
1 x A2 green or red cardboard (160gsm). If you are making more than one wreath, buy more than one A2 sleeve of cardboard.
Red cardboard (160gsm) or fluffy pom–poms
Scissors
Clear Bostik or Pritt adhesive (glue)
Large round plate
Small round bowl
Ribbon
Step 1
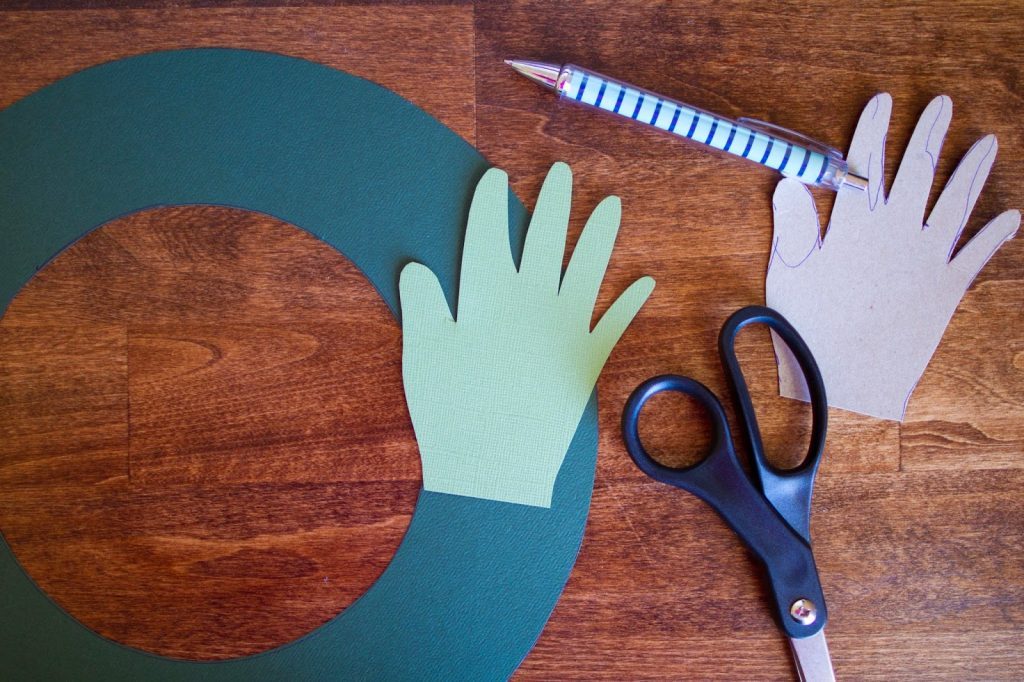
Trace your child’s hand onto the thick cardboard to make a template of his or her hand. If they are old enough, they can do this step themselves.
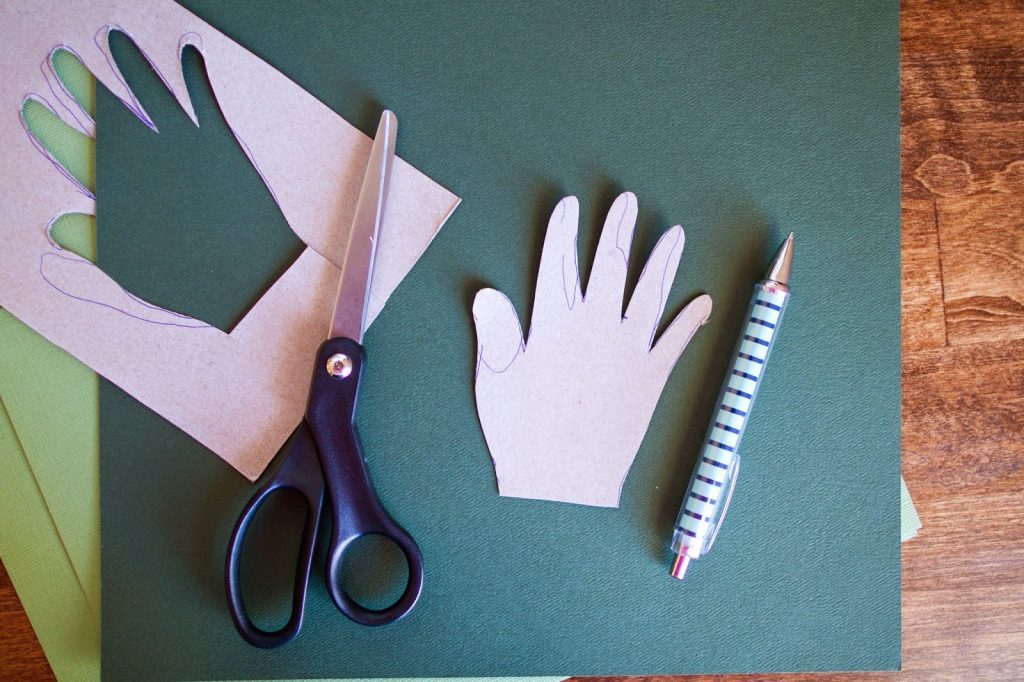
Step 2
Cut out the hand template. Again, if your child is old enough to handle scissors, allow them to complete this step. Use the hand template to trace onto the green shades of A4 cardboard. Get all the tracing out of the way first. Set your hand designs aside.
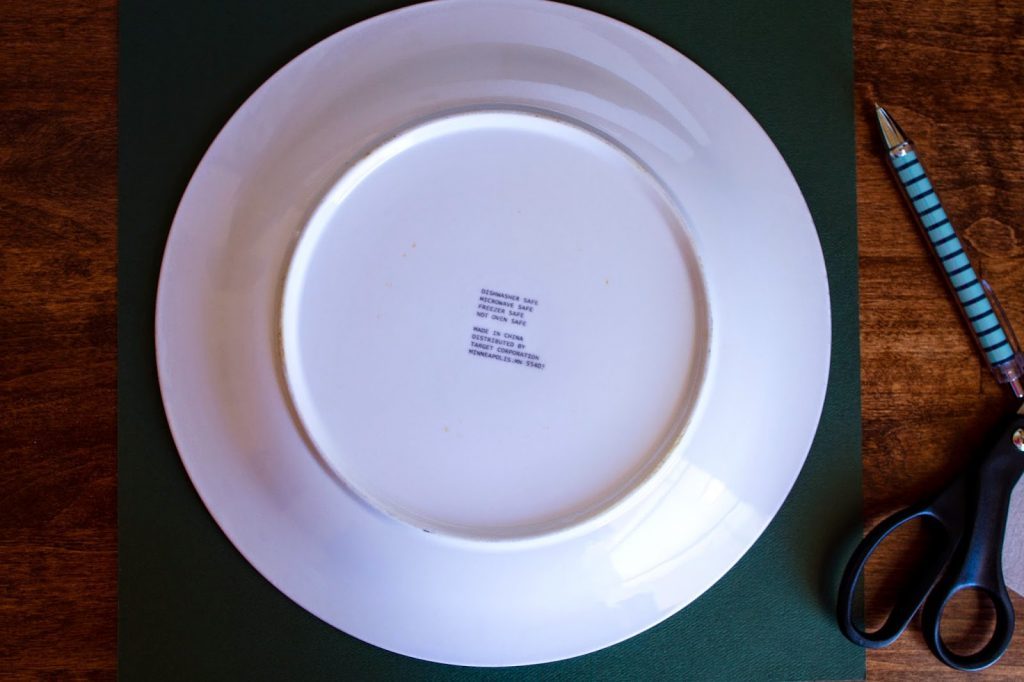
Step 3
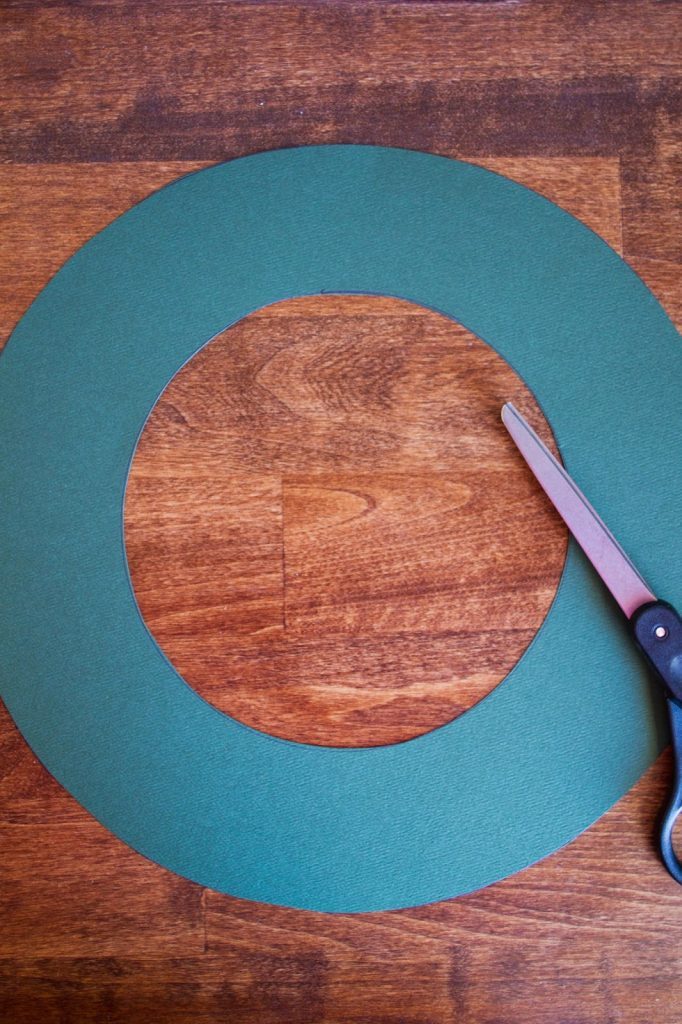
Trace the outer circle of your wreath on the A2 cardboard by using a large plate.
Step 4
Place your bowl in the centre of the circle you just traced with the large plate. The thickness of your wreath really is determined on how big or small your child’s hand is. If you are doing baby hands, you might want to go with a slightly thinner wreath. This means you need to use a smaller plate to trace your initial circle. Cut out your circles. Older kids can do this step themselves.
Step 5
Cut 20-25 hands out of the A4 green cardboard. You can turn the template over on half of the hand designs so that the fingers and thumbs do not all face the same direction. This gives the wreath some added dimension.
 Step 6
Finish your wreath off with a few red “berries” by cutting small circles from the red cardboard or by using fluffy red pom-poms. The pom-poms work really well. If you want to get creative, cut shapes like stars and snowflakes and add them to your wreath.
Step 7
Tie a ribbon around the wreath so that you can hang it up.
Watch this easy-to-follow tutorial on YouTube.
All images by My Name is Snickerdoodle.